

Hey, so theres a a couple DIYs but most are either partial/incomplete or lack the proper pictures. DO THESE ARE YOUR OWN RISK GETTING A KEY REPROGRAMMED FROM THE DEALER CAN BE COSTLY IF YOU MESS UP
Essentially the goal was to make a switchblade key for cheap. Let me just state something about this DIY so you do not make the same mistake as me:
DO NOT TRUST THE KEY BLADES FROM ASIA ALL THE ONES I WERE SENT DID NOT WORK IN THE CAR! BUY AT YOUR OWN RISK
CAREFUL OF SELLERS WHO SAY THEY WILL CUT AND PROGRAM YOUR KEY I will touch on them later but the only company I would trust is HeelToe Automotive and their key conversion services.
Things you need:
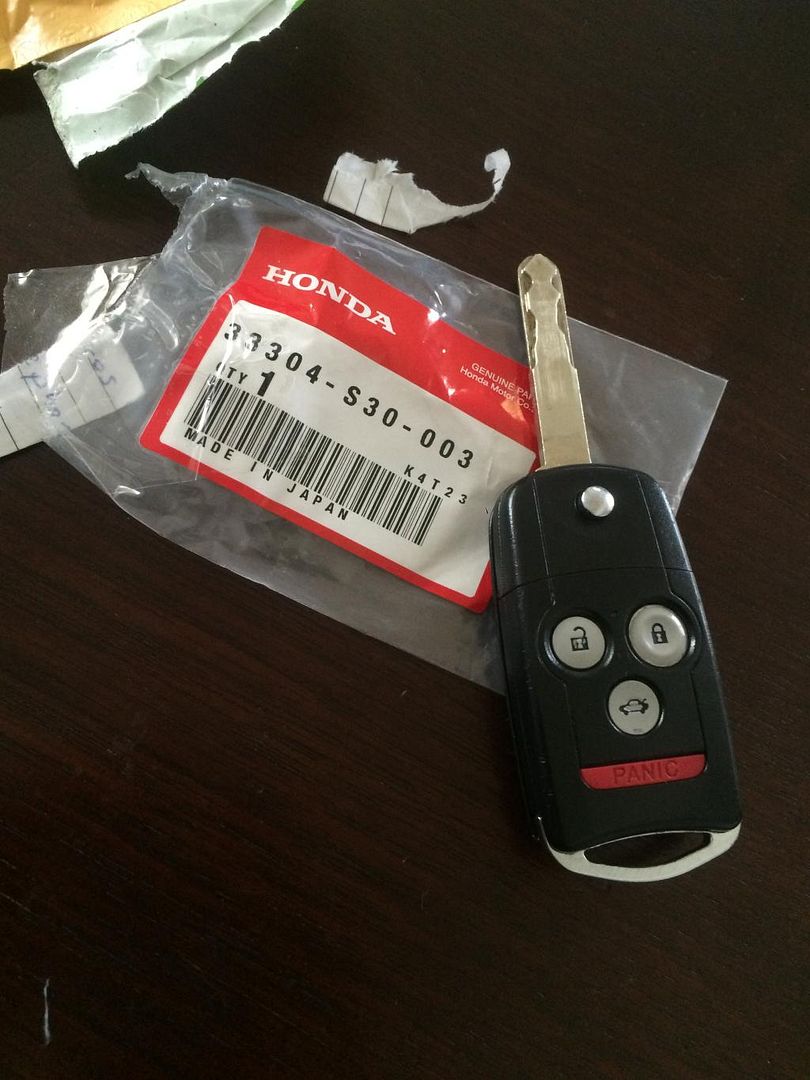
OEM TL-S Key Fob FCC ID: OUCG8D
OEM Key and Copy of OEM key
Tiny phillips screw driver (micro sized)
JB Kwik Weld
JB Putty (optional)
Dremel
Drill
Sandpaper (coarse and smooth grit) (optional)
Costs:
TL-S Fob: $35
RDX Plate: $10
Key Copy: $4.00
Spare Parts: $14.00
Materials: $8.00
Total: $71.00
eBay fob: $55.00
extra blades (3): $50.00
extra H shell: $30.00
Total: $135.00
DIY Cost: $206.00
Actual Cost (shipping, etc.): Close to $280.00
Ill detail later how the eBay route was not cost effective and ended up costing this project more than I intended.
That being said: if you get an eBay fob, you can program the board to the car but the easiest method is to either get a spare cut to the car or cut up your OEM one.. I did both. The only easy way out is to go through Heeltoe and pay the price to get one made but I will touch on them later.
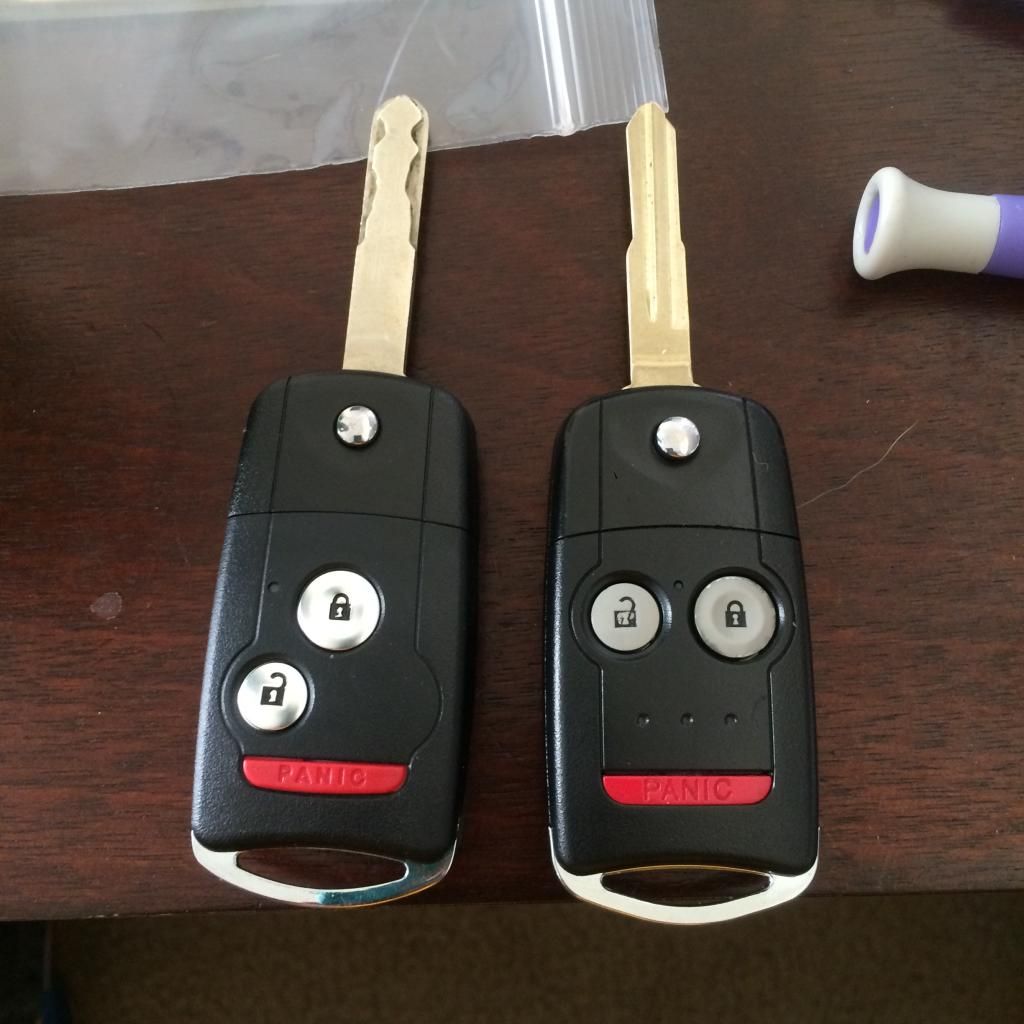
So what you need: OEM TL-S Switchblade key or eBay flip key
(The TL has the RDX plate to delete the trunk button)
READ Spaz's DIY on seeing how to cut open your OEM key for the immobilizer and how to program your buttons
http://forums.clubrsx.com/showthread.php?t=738545&highlight=key+conversion
eBay fob has a different button layout but works. Everything about it is oem in size and build. Theres a little modification needed to mix OEM with eBay and vice versa.
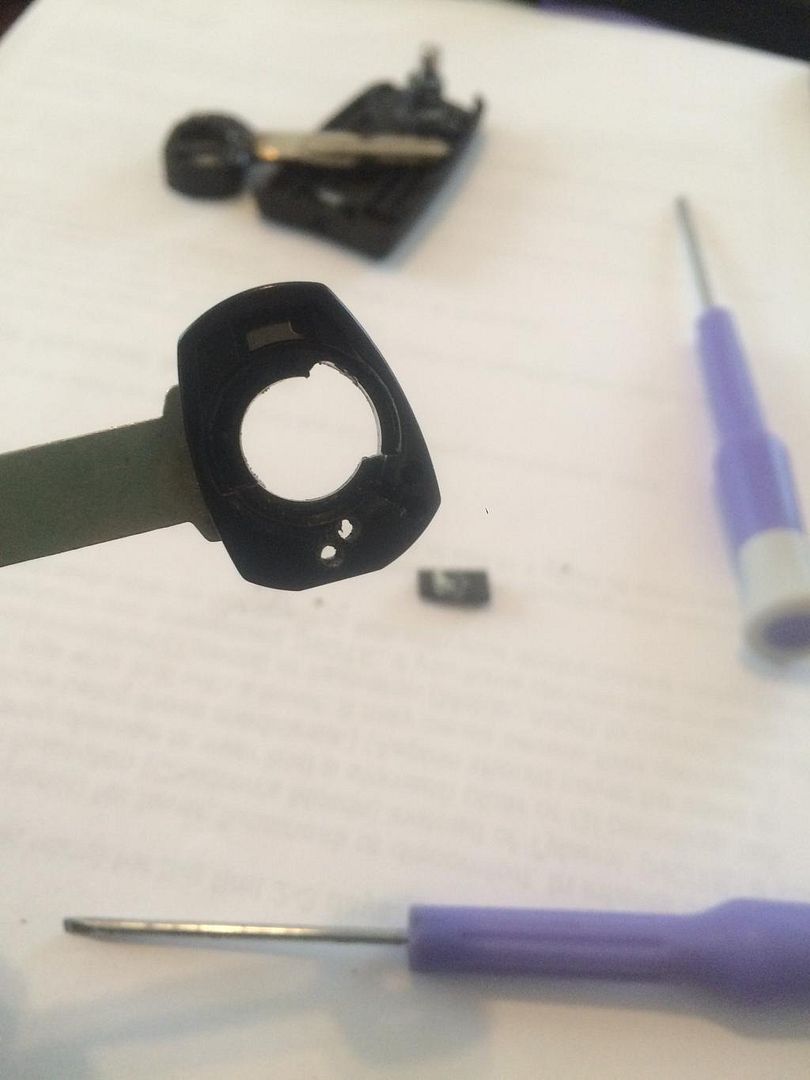
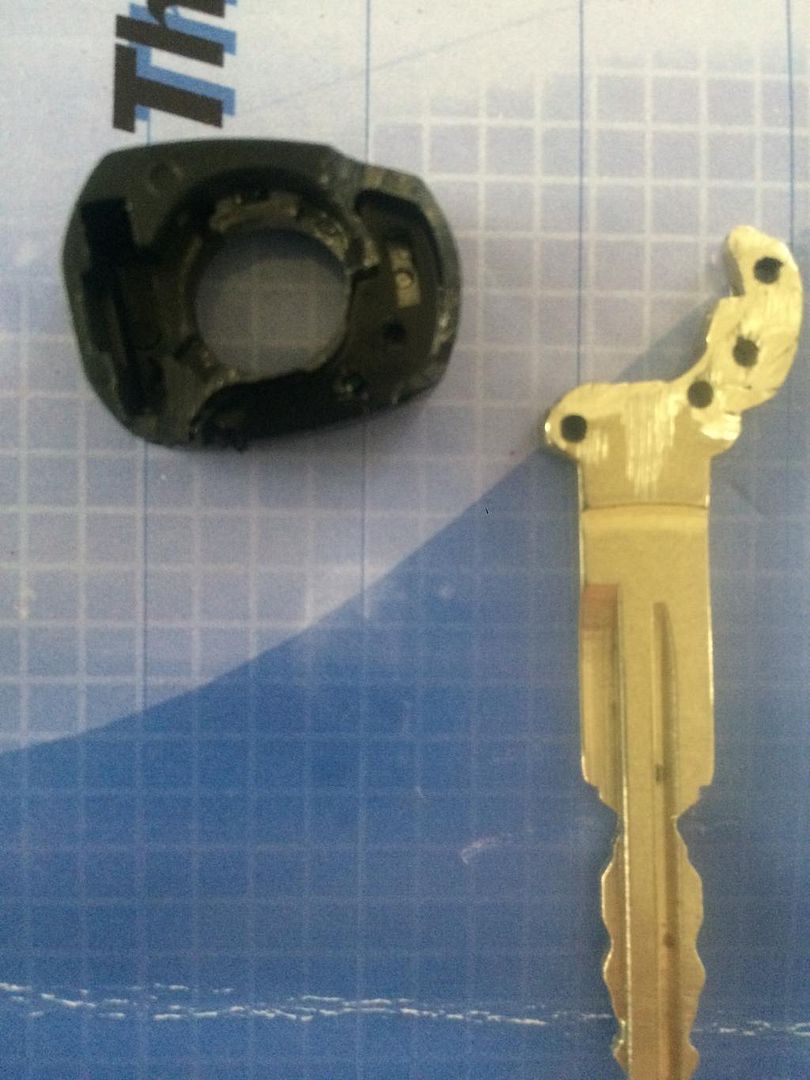
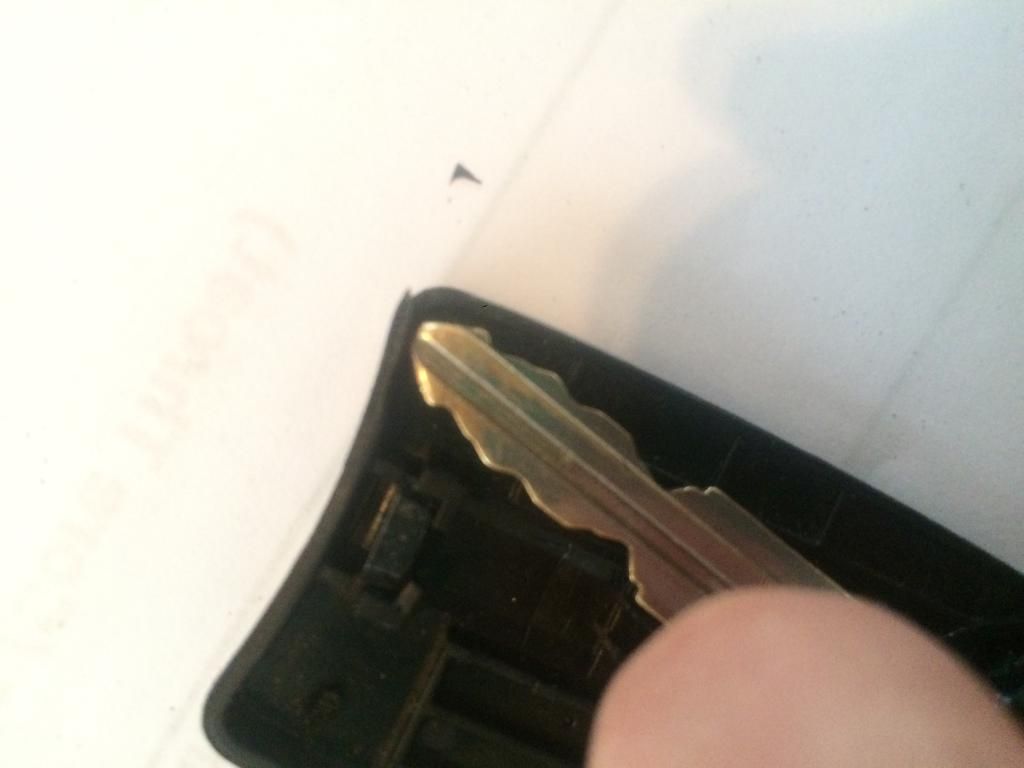
Unscrew and disassemble the fob. There will be a total of 4 screws, a torsion spring, button and spring and the swivel and key with the plate. Dont lose anything but you can find replacement screws at an Ace hardware (tiny machine screws)
Take out the key and you will proceed to take out the metal half circle track guide and the transponder. Chances are your FOB has never been taken apart so theres 3M tape holding things in place so you will have to use some force (you may have to drill out the old transponder chip from the TL fob)
Now you can begin to cutting the old key out.
Dremel away the bottom of the swivel until the entire key can seen
THE LESS THE BETTER! Ill make a second post of why the original method doesnt work as well.

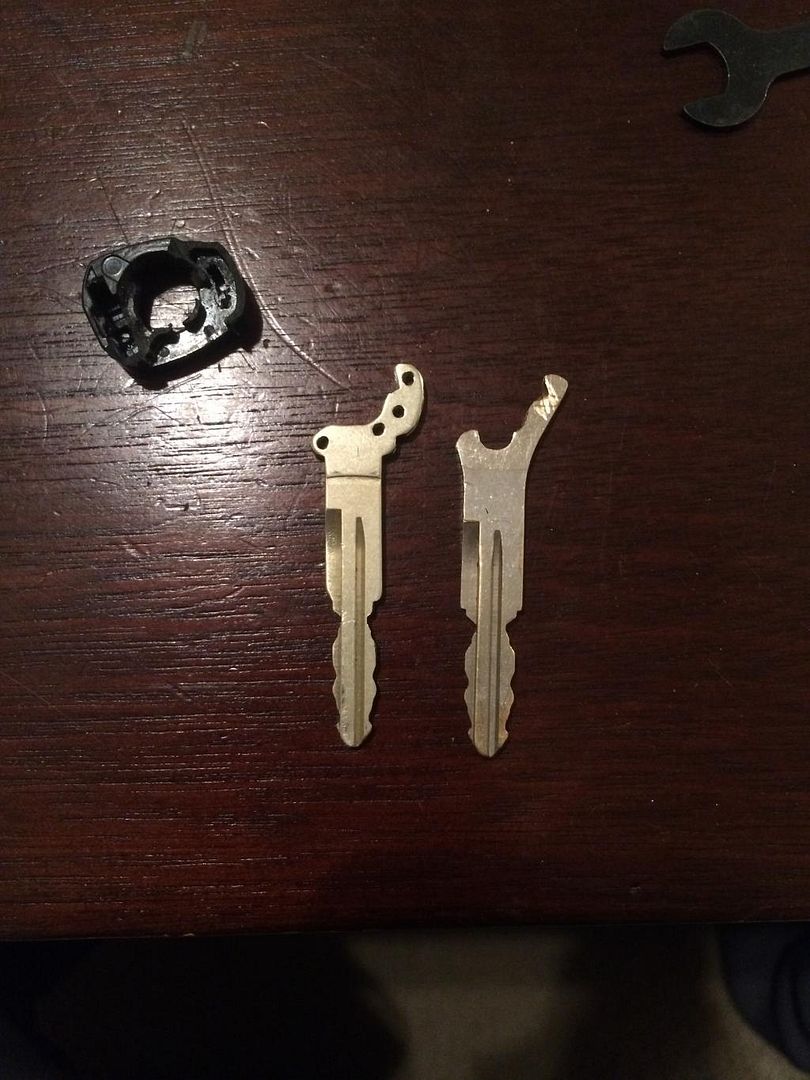
Drill out the 4 holes in the key that keep it in place (it makes it easier for the key to pop out)
Now you have a template for your key to cut to shape! This is a copy of my OEM one
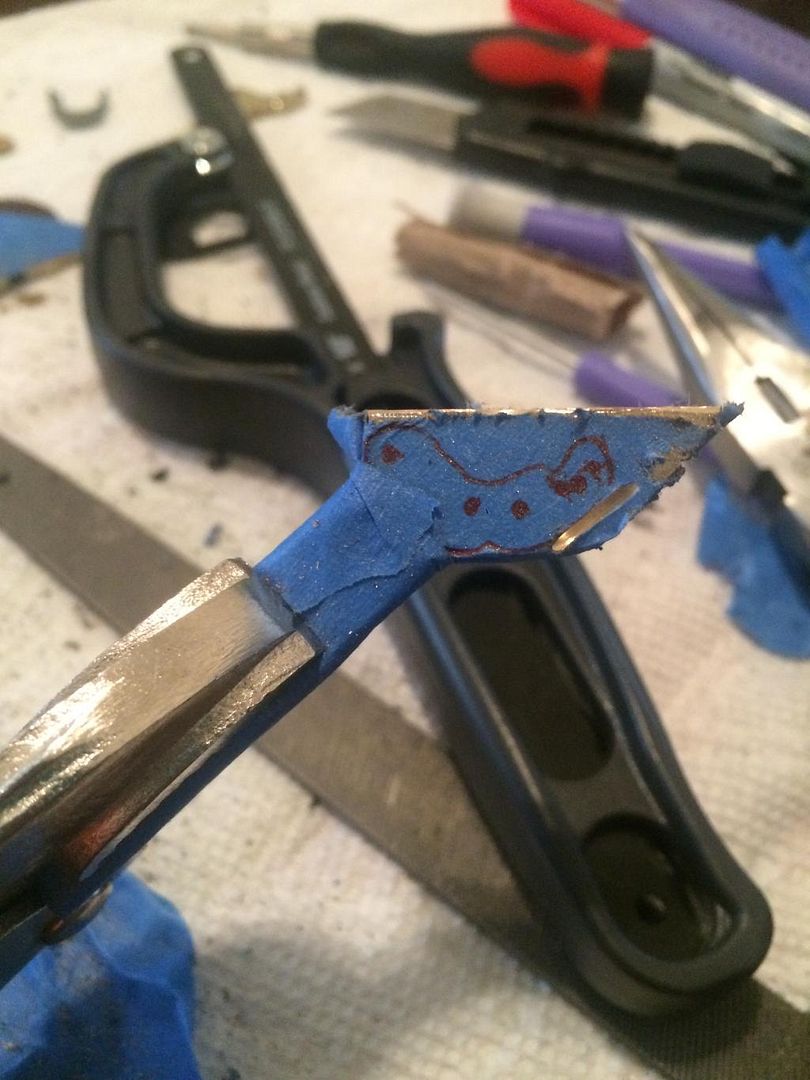
I traced mine with tape and cut and then rubber banded the two together and just cleaned it up. I found going a little smaller with the template helps when you glue it inside.
Here is my OEM key I cut, theres a gap in the middle of the OEM key and so you can make a perfect cut but its okay.
I found using the JB Kwik Weld works the best. Make sure you key fits flat and snug into the swivel. The plastic flexes a bit so mine I have to work its way in and it had no wiggle. This is the goal to keep everything tight and not risk it breaking.
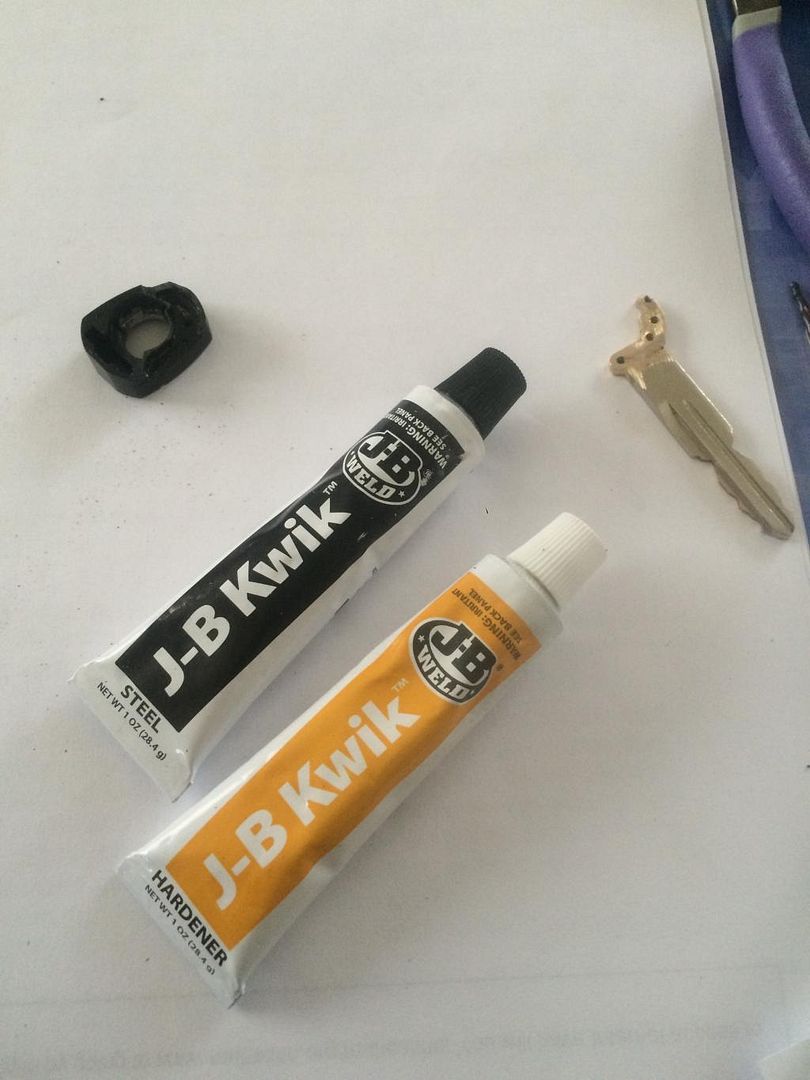
I put some JB Kwik in the slot and pressed the key in, you want excess to come THROUGH the little holes you drilled earlier. This will help keep it all solid and in place.
As the JB kwik is settling, you can use extra and build back the swivel you cut away. It wont be perfect, but you just need the excess to go a little around the edge to cement it in place. By a little I am talking a Millimeter or two. There isnt much room to play but you can sand away to make it flip freely.
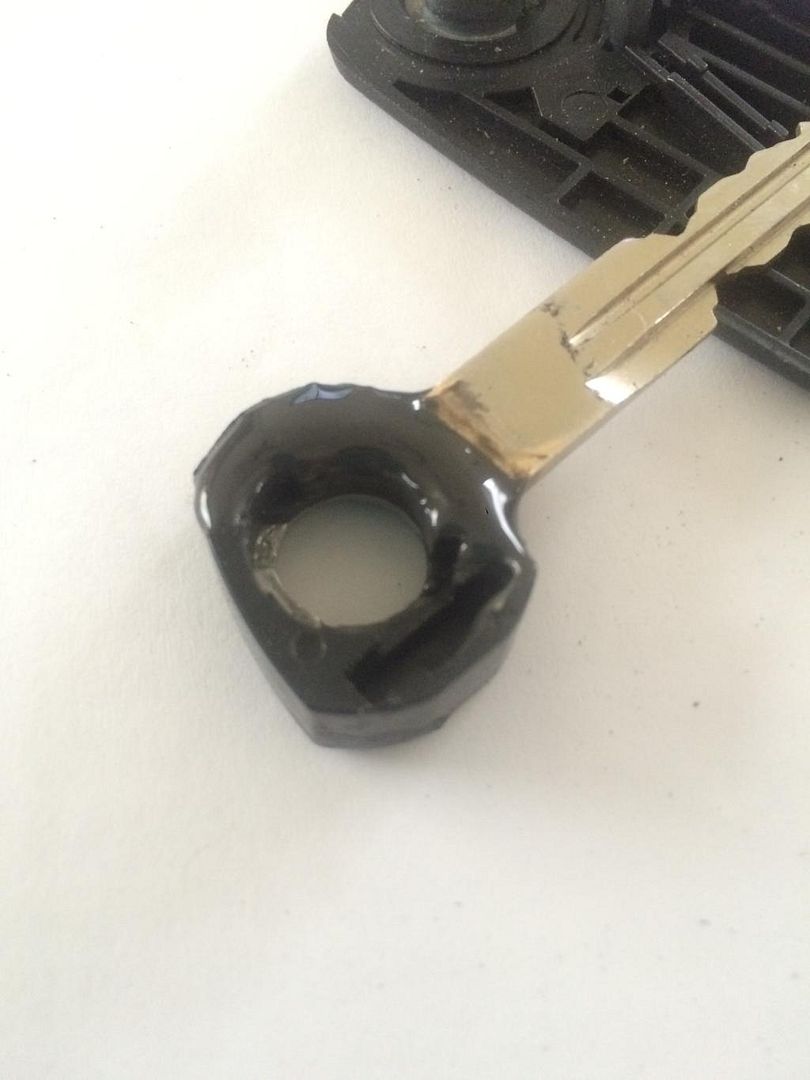
Let it dry, it takes 24 hours to cure fully but after half an hour or so it should be dry enough to test in the fob. You want it to lock without poking out the side and lock sitting straight up. If theres too much weld depending how dry it is, you can use an exacto knife and cut some off or sand it down, just make sure its flat!
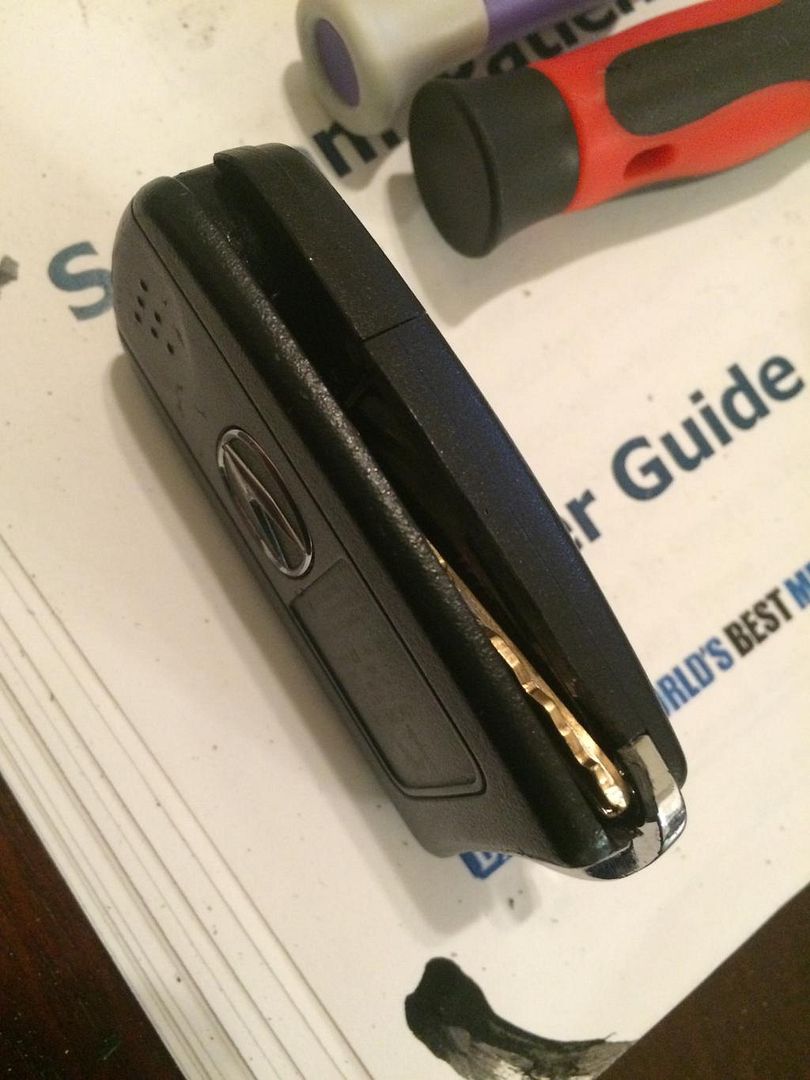
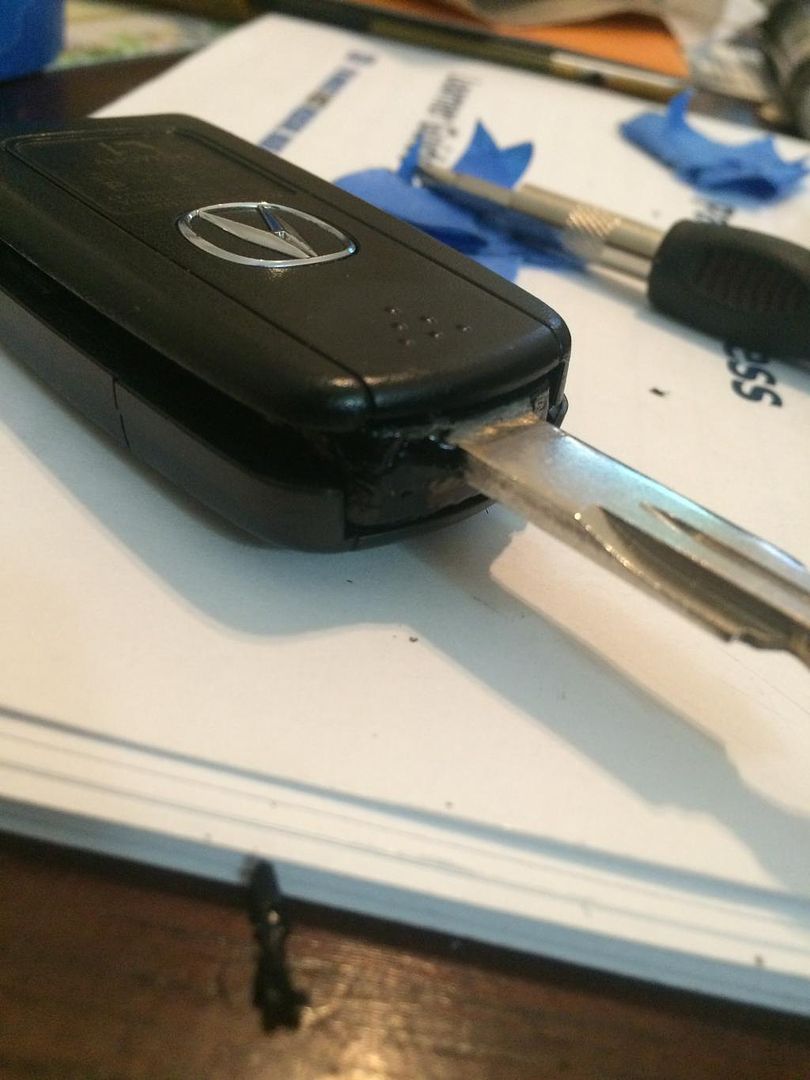
For me, my first key was too long and it angled upward wouldnt come out of the fob, I had to cut a notch out of the bottom corner and side for it to clear and now works flawlessly.
I dont have any pictures but I did use the JB Weld Putty to fill in some grooves and clean up the swivel. I sanded it down and used NHBP touch up paint I had laying around to give it some of that shine again.
Finally, it is time to place the immobilizer chip into the fob.

It goes where the old one was, it should fit without modding the hole but the cover wont fit over it. you can drill out to make it longer and work, I am awaiting to be 100% done and positive I dont need to do anything else to these keys before I do something like hot glue them in but because the key closes as long as they sit snug inside it wont go anywhere.
Let everything dry and you can move on to testing the key
I am ordering a TL board for my RDX key but the other is the TL-S.
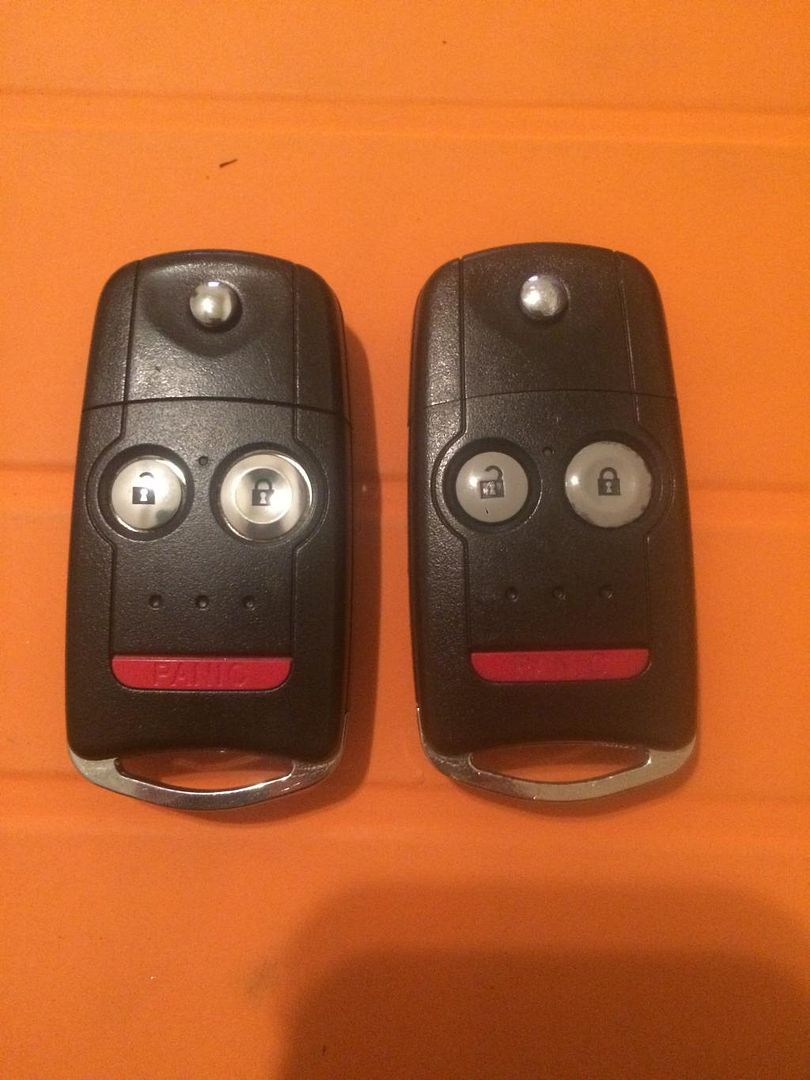
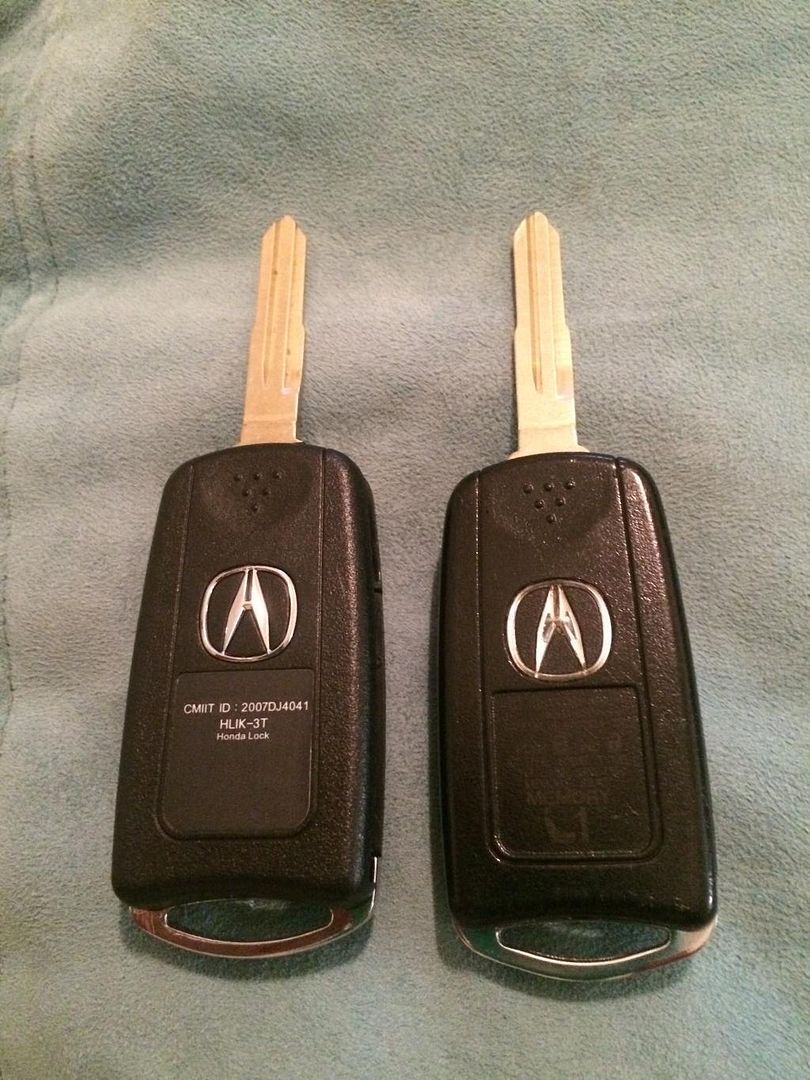
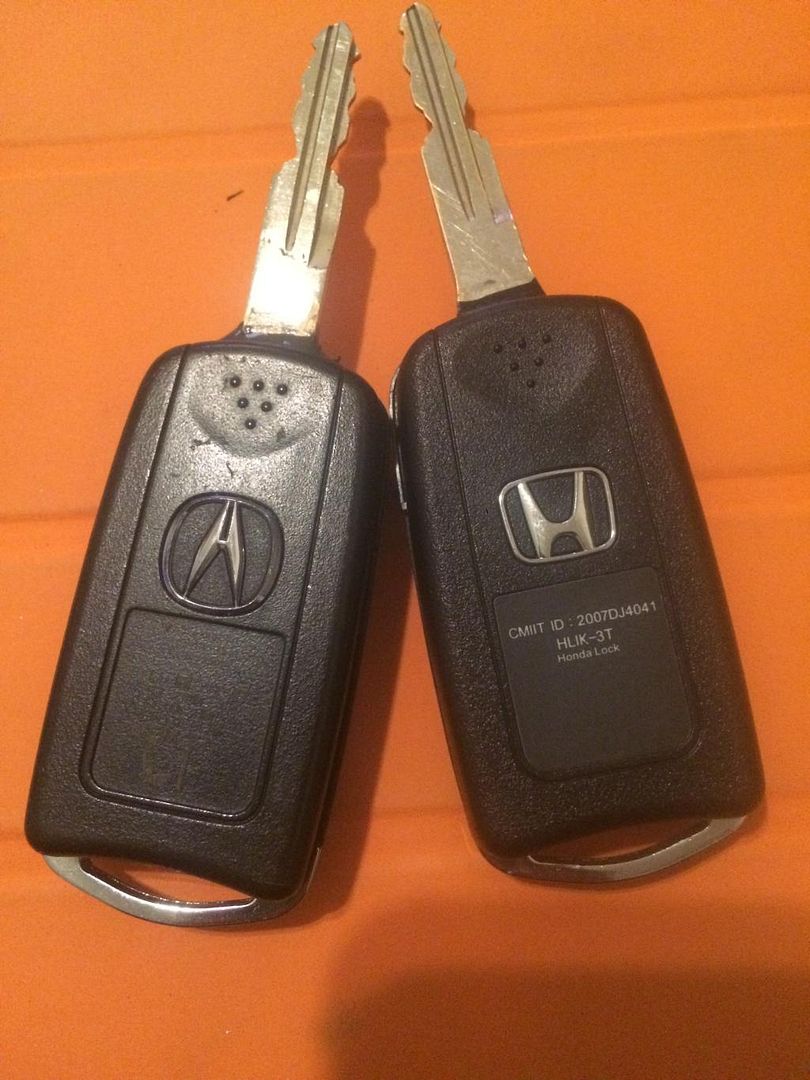
The "H" emblem fob is from an eBay fob but I put the TL board on top. Honda does NOT officially make a flip key for the vehicles.
**Before you ask for one, I have contacted the seller after finally getting one on the way and they have yet to respond to me..**
My goal was to have a H flip key to match my emblems on my car and an Acura one to remain as OEM as I could so I had 2 keys along with a backup spare.
HUGE THANKS to the guys at HeelToe Automotive, while they make a key, cut and chip swapped for your car for around 170 bucks. I told them my situation and they hooked me up with all the spare parts I needed as well as some extra goodies. If you check out their site (https://www.heeltoeauto.com/now-offering-spare-parts-for-fastline-switchblade-honda-acura-keys.html) they offer any spare parts in case you mess up your DIY.
For you guys out there willing to pay to play, seek them out. Excellent Customer Service and they will work with you to meet your needs!
I must advise, you will spend the same if not more if you go the eBay key route because the hardest part is finding a pre-molded key blade for our car in the swivel.
The keysmith and I examined the eBay with the OEM key and we found the middle groove is literally a hair wider than ours and the thickness is a hair thicker, this is just enough to stop the key from turning in our locks. I went through 3 eBay blanks out of 5 before I decided to go with a OEM and a copy. I wasted too much money and time trying to get it to work so don't make the same mistake as I.
I found you can buy new TL-S Button and boards from Honda for about $35 bucks. This is the last thing I need to have 2 working fobs.
If you have any questions, post them here and I will stay on top and answer what I can to the best of my abilities.
The next post will detail the "traditional" way people did it in a way that I first tried doing the DIY and it didn't workout as well.
Essentially the goal was to make a switchblade key for cheap. Let me just state something about this DIY so you do not make the same mistake as me:
DO NOT TRUST THE KEY BLADES FROM ASIA ALL THE ONES I WERE SENT DID NOT WORK IN THE CAR! BUY AT YOUR OWN RISK
CAREFUL OF SELLERS WHO SAY THEY WILL CUT AND PROGRAM YOUR KEY I will touch on them later but the only company I would trust is HeelToe Automotive and their key conversion services.
Things you need:
OEM TL-S Key Fob FCC ID: OUCG8D
OEM Key and Copy of OEM key
Tiny phillips screw driver (micro sized)
JB Kwik Weld
JB Putty (optional)
Dremel
Drill
Sandpaper (coarse and smooth grit) (optional)
Costs:
TL-S Fob: $35
RDX Plate: $10
Key Copy: $4.00
Spare Parts: $14.00
Materials: $8.00
Total: $71.00
eBay fob: $55.00
extra blades (3): $50.00
extra H shell: $30.00
Total: $135.00
DIY Cost: $206.00
Actual Cost (shipping, etc.): Close to $280.00
Ill detail later how the eBay route was not cost effective and ended up costing this project more than I intended.
That being said: if you get an eBay fob, you can program the board to the car but the easiest method is to either get a spare cut to the car or cut up your OEM one.. I did both. The only easy way out is to go through Heeltoe and pay the price to get one made but I will touch on them later.
So what you need: OEM TL-S Switchblade key or eBay flip key

(The TL has the RDX plate to delete the trunk button)

READ Spaz's DIY on seeing how to cut open your OEM key for the immobilizer and how to program your buttons
http://forums.clubrsx.com/showthread.php?t=738545&highlight=key+conversion
eBay fob has a different button layout but works. Everything about it is oem in size and build. Theres a little modification needed to mix OEM with eBay and vice versa.

Unscrew and disassemble the fob. There will be a total of 4 screws, a torsion spring, button and spring and the swivel and key with the plate. Dont lose anything but you can find replacement screws at an Ace hardware (tiny machine screws)
Take out the key and you will proceed to take out the metal half circle track guide and the transponder. Chances are your FOB has never been taken apart so theres 3M tape holding things in place so you will have to use some force (you may have to drill out the old transponder chip from the TL fob)

Now you can begin to cutting the old key out.
Dremel away the bottom of the swivel until the entire key can seen
THE LESS THE BETTER! Ill make a second post of why the original method doesnt work as well.

Drill out the 4 holes in the key that keep it in place (it makes it easier for the key to pop out)

Now you have a template for your key to cut to shape! This is a copy of my OEM one

I traced mine with tape and cut and then rubber banded the two together and just cleaned it up. I found going a little smaller with the template helps when you glue it inside.
Here is my OEM key I cut, theres a gap in the middle of the OEM key and so you can make a perfect cut but its okay.

I found using the JB Kwik Weld works the best. Make sure you key fits flat and snug into the swivel. The plastic flexes a bit so mine I have to work its way in and it had no wiggle. This is the goal to keep everything tight and not risk it breaking.

I put some JB Kwik in the slot and pressed the key in, you want excess to come THROUGH the little holes you drilled earlier. This will help keep it all solid and in place.
As the JB kwik is settling, you can use extra and build back the swivel you cut away. It wont be perfect, but you just need the excess to go a little around the edge to cement it in place. By a little I am talking a Millimeter or two. There isnt much room to play but you can sand away to make it flip freely.

Let it dry, it takes 24 hours to cure fully but after half an hour or so it should be dry enough to test in the fob. You want it to lock without poking out the side and lock sitting straight up. If theres too much weld depending how dry it is, you can use an exacto knife and cut some off or sand it down, just make sure its flat!
For me, my first key was too long and it angled upward wouldnt come out of the fob, I had to cut a notch out of the bottom corner and side for it to clear and now works flawlessly.


I dont have any pictures but I did use the JB Weld Putty to fill in some grooves and clean up the swivel. I sanded it down and used NHBP touch up paint I had laying around to give it some of that shine again.
Finally, it is time to place the immobilizer chip into the fob.

It goes where the old one was, it should fit without modding the hole but the cover wont fit over it. you can drill out to make it longer and work, I am awaiting to be 100% done and positive I dont need to do anything else to these keys before I do something like hot glue them in but because the key closes as long as they sit snug inside it wont go anywhere.
Let everything dry and you can move on to testing the key
I am ordering a TL board for my RDX key but the other is the TL-S.

The "H" emblem fob is from an eBay fob but I put the TL board on top. Honda does NOT officially make a flip key for the vehicles.
**Before you ask for one, I have contacted the seller after finally getting one on the way and they have yet to respond to me..**

My goal was to have a H flip key to match my emblems on my car and an Acura one to remain as OEM as I could so I had 2 keys along with a backup spare.
HUGE THANKS to the guys at HeelToe Automotive, while they make a key, cut and chip swapped for your car for around 170 bucks. I told them my situation and they hooked me up with all the spare parts I needed as well as some extra goodies. If you check out their site (https://www.heeltoeauto.com/now-offering-spare-parts-for-fastline-switchblade-honda-acura-keys.html) they offer any spare parts in case you mess up your DIY.
For you guys out there willing to pay to play, seek them out. Excellent Customer Service and they will work with you to meet your needs!
I must advise, you will spend the same if not more if you go the eBay key route because the hardest part is finding a pre-molded key blade for our car in the swivel.
The keysmith and I examined the eBay with the OEM key and we found the middle groove is literally a hair wider than ours and the thickness is a hair thicker, this is just enough to stop the key from turning in our locks. I went through 3 eBay blanks out of 5 before I decided to go with a OEM and a copy. I wasted too much money and time trying to get it to work so don't make the same mistake as I.
I found you can buy new TL-S Button and boards from Honda for about $35 bucks. This is the last thing I need to have 2 working fobs.
If you have any questions, post them here and I will stay on top and answer what I can to the best of my abilities.
The next post will detail the "traditional" way people did it in a way that I first tried doing the DIY and it didn't workout as well.


